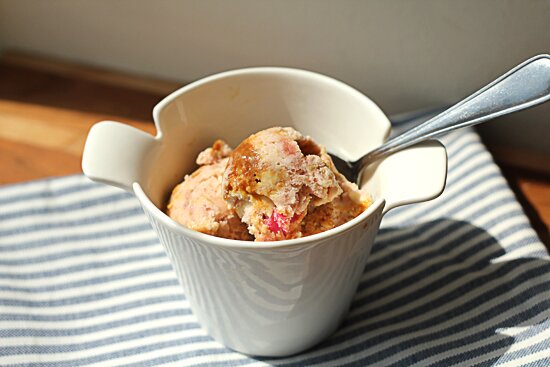
 Yes, it is that time of year to dust off the ice cream maker! I feel like I took a bit of a hiatus with my ice cream maker over the last summer or two. I’m not even sure why. I LOVE making ice cream from scratch. I just adore the different flavour combinations that you can make… like this rhubarb ice cream with a caramel swirl. Around this time of year I become obsessed with rhubarb and with it being so hot out having it in my ice cream is the perfect combination.
I was reading the NY Times a while back and came across this recipe for Rhubarb ice cream. I immediately saved for later use.
As far as ice cream recipes go this is pretty basic and easy to execute… but it does have some cool twists. Since rhubarb can be super tart, this recipe simmers it in sugar to form a compote that tames the tartness and injects some sweetness… well played. As for the the ice cream base, they had the brilliant idea of adding in sour cream. Yes, sour cream! It lends a great tang to the base and requires basically no extra work.
Truth be told I made this ice cream a few weeks ago and it holds up really well. It is super creamy, vanilla-y and rhubarb-y. A new fave for sure. I made the mistake of almost burning my caramel (and was too lazy to make a new batch) but otherwise all is good. It also goes really well with desserts that require a scoop of ice cream. Definitely think about pairing it alongside desserts featuring strawberries, apples, berries and probably some other goodness.
Rhubarb Ice Cream with a Caramel Swirl
1 and 1/2 cups whole milk
1 and 3/4 cup plus 6 tablespoons granulated sugar
Pinch fine sea salt
1 vanilla bean, split and scraped
4 large egg yolks, lightly beaten
1 and 1/2 cups sour cream
3/4 pound rhubarb, cut into 1/2-inch dice
1/2 cup heavy cream
1. Whisk together milk, 3/4 cup sugar, salt, vanilla bean seeds and its pod in a pot over medium heat. Simmer until the sugar dissolves. Remove from heat, cover, and steep 30 minutes. Throw out the vanilla pod and bring the mixture back up to a simmer.
2. Put the yolks in bowl and slowly whisk in the warm milk mixture. Return the custard back to the pot and cook over medium-low heat, stirring often until the mixture is thick enough to coat the back of a spoon. Strain the mixture through a fine-mesh sieve into a bowl and whisk in sour cream. Allow to chill overnight (or for at least 3 hours).
3. In a separate pot mix the rhubarb with 1 cup sugar. Simmer until rhubarb is tender and starts to release juices. Transfer rhubarb to a bowl using a slotted spoon and allow the liquid in the pot to simmer until syrupy. Pour the syrup over the rhubarb. Cool completely.
4. Add two tablespoons to a nonstick skillet over medium heat. When the sugar begins to melt and take on colour add two more tablespoons of sugar. Swirl to distribute sugar. Add the last two tablespoons of sugar and cook swirling until all the sugar has melted and it caramelizes and turns dark brown. Pour in the heavy cream and two tablespoons of water (be careful, it splatters!). Simmer, stirring occasionally, until smooth. Cool.
5. Pour the custard base into an ice cream machine and churn. Add rhubarb compote and churn for another minute.
6. Pour a quarter of the caramel into the bottom of a quart container. Top with a quarter of the ice cream. Continue layering until all of the caramel and ice cream has been used, ending with ice cream. Freeze until firm (at least 2 hours). Serve!
YIELD One scant quart.
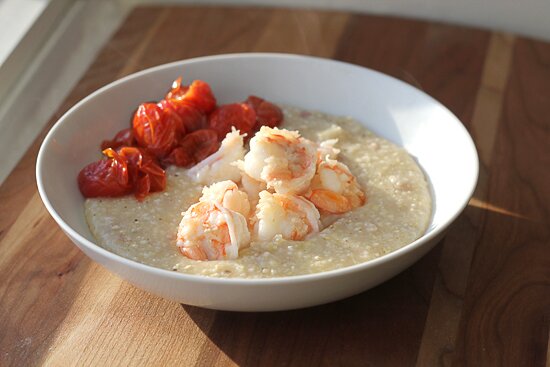
I have blogged a WHOLE lot about shrimp and grits. I can’t help myself, I just love me some shrimp and grits! In my quest for the most delicious shrimp and grits I often come across the name Anson Mills. Anson Mills is a South Carolina based company that produces artisan milled goods from organic heirloom grains. They sell things like Carolina gold rice, oats, and grits among a number of other grain products.
One random evening I was on their site and decided to take the plunge and place an order. The prices aren’t cheap but they aren’t that expensive. I mean I’d rather pay $5.95 for 12 oz of Anson Mills grits than $2.99 for 24 oz of the regular supermarket stuff. I ordered coarse grits, quick grits, carolina gold rice, steel cut oats and polenta which came to about $30 before shipping (shipping was another $15 and I shipped to my sis in Chicago to keep costs down). The stuff is so fresh that you have to freeze it immediately. Their products are fresh milled to order. It’s all pretty incredible.
So far I haven’t been disappointed by their products at all. Their steel cut oats are ridiculously easy to prepare and are so much better than other brands of steel cut oats that I’ve tried. The grits cook up creamy and delicious without the need for cream. The rice is also pretty great. Thank heavens I’m moving to the U.S. so that I can order this stuff ALL.THE.TIIME. They do ship to Canada but it is of course pricey.
I stumbled across this recipe on Michael Ruhlman’s site and immediately fell in love at the words “butter-poached”. It just so happened that I had some more Stirling Creamery butter in my freezer so I knew I’d be poaching those shrimp in extra good butter. Charlie Sheen would hashtag this #winning (wait, is #winning still a thing? On that note… where is Charlie Sheen?).
This was the first time I ever poached anything in butter and it felt super indulgent. You make a beurre monté which basically amounts to putting some water in a pan, adding butter and whisking the butter around in an effort to keep it emulsified and not break apart. A pretty cool technique. You then ensure that the butter has reached the right temperature, drop the shrimp and allow the shrimp to cook through. The butter really brings out the sweetness of the shrimp and even imparted a nuttiness to them. In the end you’re left with a bunch of shrimpy butter which is kind of annoying. I saved the butter and have used it in other seafood dishes.
After successfully butter-poaching shrimp I’m now intrigued by what else I can poach in butter. Any suggestions?
Butter-Poached Shrimp and Anson Mills Grits
4 ounces/115 grams bacon, cut into small dice
1 medium onion, cut into small dice
Kosher salt
1 1/4 cups/250 grams high-quality stoneground grits
2 cups/480 milliliters milk or homemade vegetable or chicken stock (optional)
Freshly ground black pepper
1 cup/225 grams butter, cut into about 12 chunks
1 pound/455 grams shrimp/prawns, peeled and deveined
4 lemon wedges
Heat a medium saucepan over medium heat and add the bacon and water to cover. Cook until the water has cooked off and then reduce the heat and cook until the bacon is lightly covered and there is enough fat in which to fry the onion. Add the onion with a generous pinch of salt and cook until softened.
Add in the grits along with milk or stock and 2 cups of water (or if not using milk/stock use 4 cups of water). Raise the heat and bring the grits to a simmer. Reduce heat and stir the grits occasionally for about 30 minutes (will depend on the type of grits you’re using). Season with pepper and add more liquid as needed. Continue cooking until the desire texture/consistency is reached.
Once grits are cooked heat 2 tbsp of water in a saucepan to a simmer over medium-high heat. Add in a chunk of butter and whisk until the butter melts. Once the butter has started to melt and emulsify into the water add three more chunks of butter. Once all the butter has been added, dump in the shrimp and stir. You don’t want the butter to boil and want to keep the temperature around 170° to 180°F/77° to 82°C. Cook the shrimp for about 3-5 minutes and be sure to remove a shrimp and cut it open to make sure that it is cooked through.
Reheat the grits and add about a third of the poaching butter to the grits. To serve spoon grits onto a plate and top with shrimp. Feel free to serve with more butter (obvi), freshly ground pepper and/or lemon.
Every once in a while I get the urge to do a cleanse. The first time I did a cleanse I went for the gold and did the Master Cleanse. You’ve heard of it. It’s the one where you drink nothing but water mixed with lemon juice, cayenne pepper and maple syrup for 10 days. Yes, it’s crazy but I loved it. I’m not into cleansing for any crazy weight loss goals, I like to do it to give my body a bit of a break and also to refocus my mind. There’s nothing like doing a juice fast to make you realize how much you think about food.
The second time I did a cleanse it was the prescribed by a naturopath and was called the elimination diet. You get to eat (which is awesome) you just have to eliminate all sugars, gluten, red meat, common allergens etc. I really enjoyed this cleanse as you get to eat but just be more mindful about what you’re eating.
Now that my summer of fUnemployment has begun I wanted to be all “out with the old, in with the new”. So obviously a cleanse was in order. I wanted to go for the gold again but maturity told me that I should probably skip the master cleanse. I remembered reading about all of these juice cleanses that offer delivery but at $65 a day it was all too rich for my blood. Being the resourceful person I am I managed to find the recipes online for the Blueprint Cleanse and opted to do their mid-level cleanse for 5 days.
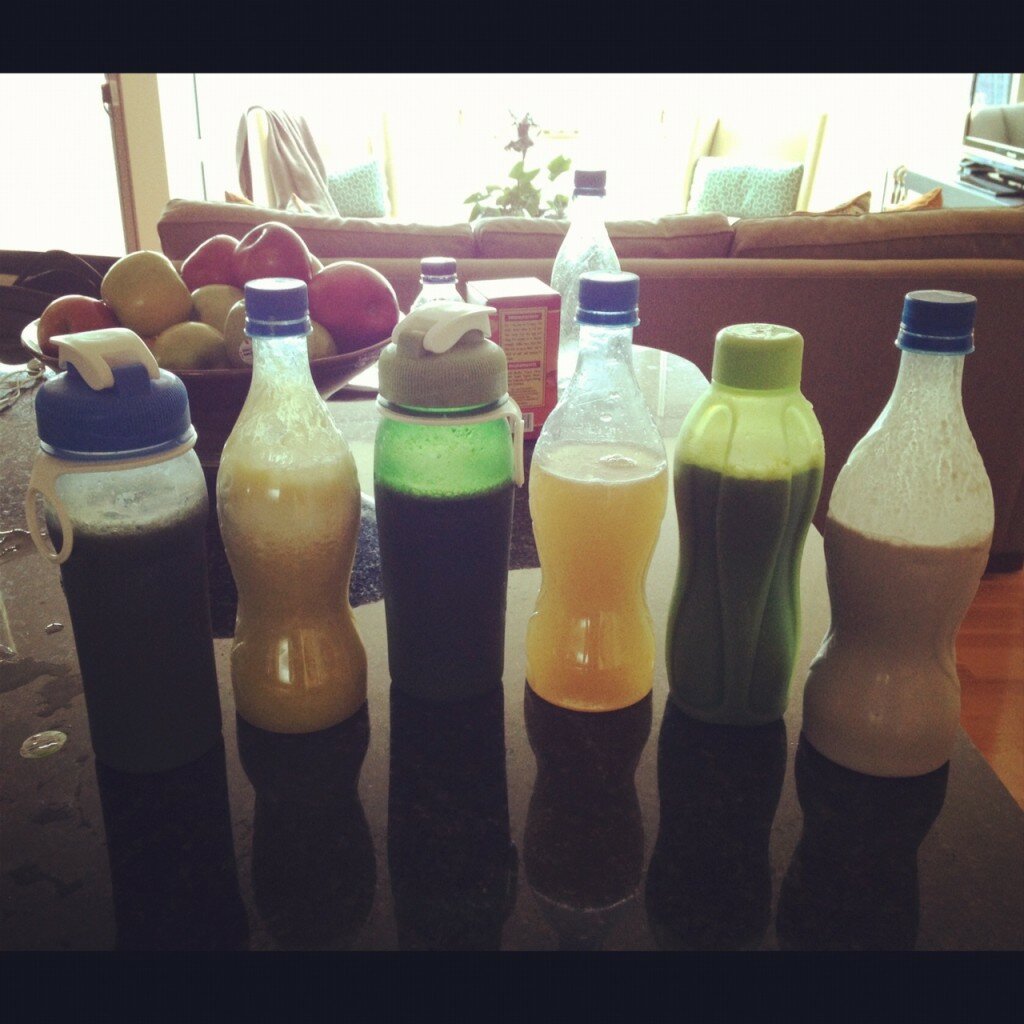
The daily menu consists of (in order):
Green Juice (romaine lettuce, kale, cucumbers, parsley, apples, celery, lemon juice)
Pineapple Apple Mint Juice
Green Juice (same as the first)
Spicy Lemonade (memories of Master Cleanse)
Green Juice (same same)
Cashew Nut Milk
It’s a lot of green juice.
Here’s a bit on my day to day experience…
Day 1
I woke up at around 6:30 or 7AM (unintentionally) and started juicing. Nearly two hours later all juices were made for the day. Yes, two hours. It’s A LOT of work. I kind of understand why people just pay the $65 per day to have the juices delivered to them. The night before my sis and I hit Stanley’s to buy produce for 2-3 days. It was the most ridiculous grocery shop of my life. I bought like 12 cucumbers, 18 apples, 3 bunches of celery, at least 10 lemons, and 20 limes among other things. It was insane. But we only spent about $50 for almost 3 days worth of “food” for 2 people.
The first juice of the day was the green juice which I didn’t mind at all. I HATE cucumbers but didn’t mind the juice as the cucumbers only lent the juice a grassy taste and not a ton of cucumberyness. The pineapple juice was delicious! Heavy on the pineapple with a hint of mint, it was sweet, refreshing and delicious. After another green juice it was on to the spicy lemonade which I pretty much had to choke down. Too lemony, too much cayenne and not enough fun. By the third green juice of the day I was just choking it down and waiting for the hour or so to pass so that I could have the cashew nut milk. The cashew milk is easily my fave of them all. It’s creamy, substantial, spicy and sweet. LOVE IT.
Surprisingly I wasn’t at all hungry and didn’t experience many side effects other than being a but sluggish. Well that and the desire to read tons of blog posts of being chronicling their experience on Blueprint.
Day 2
Day 2 went as smoothly as day one. I got up, juiced and drank juice all day long. I wasn’t hungry per se, but really just wanted food. Especially being in Chicago where there is so much good food. That is part of the problem. Whenever I’m in Chicago I spend A LOT of time eating and planning my next meal. It’s almost liberating taking that out of the equation and learning how to do things independent of food. Unfortunately this meant going to Lush and buying a bath bomb and deodorant (I haven’t shopped there since MAYBE high school) and going to J Crew and buying shorts and two cardigans from their sale section. And I also menu planned for the days after my cleanse. Clearly I need food.
Oh, and my sis and I made a deal that we each get a “cheat” snack. My snack is raw cashews since I drink them blended up in the cashew nut milk what’s the big deal if I steal a few?
Day 3
Things were still motoring along on day 3 although I couldn’t stop thinking about food. I was looking at restaurant menus, reading food blogs… all of it! Clearly I’m obsessed with food. Oh and I bought a dress. What I’m not spending on food, I’m spending on clothes. Not. Good.
Day 4
By day 4 I was soooo done with green juice. It got to the point where I was choking it back. It’s not that I didn’t like it, I had just had too much of it. I opted to skip my second green juice. I wasn’t that hungry and the thought of drinking the green juice was more off-putting than being hungry. It was a welcome break. Oh, and I met my friend Mandy for iced tea. It was nice to have a different flavour in my mouth.
Day 5
This was a bizarro day because it was also a travel day! It was also even more bizarre because my sis and I decided to get doughnuts at the to be consumed post-cleanse. I was able to drink to drink a few of my juices but I had a late afternoon flight and of course couldn’t bring my juice with me. I decided to buy a green juice at the airport (Odwalla) but of course it was way more fruit-based than the cleanse juice. It was a nice change though. My intent was to get home and juice upon arrival but I was pooped so I caved and had a salad to avoid a SERIOUS case of the hangries. I then closed out the day with some cashew milk. It made me happy.
Post-Cleanse
I decided to be pretty thoughtful with my post-cleanse routine. When I did the Master Cleanse I broke the cleanse with a cupcake from Magnolia… at midnight. I don’t remember it screwing with my system that badly but I wanted to break this fast/cleanse a bit smarter.
I started the day of with some room temp water with lemon and a bit of fruit. For lunch I made a fantastic kale salad with apples, carrots, beets, walnuts, dried cranberries, red peppers and some other goodness. For dinner I decided to incorporate some gluten and made pitas from scratch and did a bit of a Mediterranean platter with hummus, veggies, nut meat and tabbouleh salad. It was heavenly. And I also had my doughnut. My sweet, sweet doughnut…
In the days post cleanse I’ve definitely been feeling a lot more full than I normally do. I’ve also noticed that my body HATES dairy. I had a small piece of cheese and immediately became stuffy and mucousy. It sucked. But not enough for me to give up cheese.
Would I do the cleanse again? Possibly. I’d consider making 3 days worth of juice at once vs. juicing every day. OR I’d just have the juices delivered. The volume of juicing was WAY too much for me. In terms of the effects of the cleanse it was great to feel lighter (not in terms of being fat vs. thin but more so just less weighty inside my body) and it was especially great that my allergies didn’t bother me. I’d also be more vigilant about taking my Smooth Move tea to… keep things moving. It’s very necessary.
If sweet potato gnocchi was a song, a few years back it would’ve been my JAM! I actually blogged about this dish back in 2009 and the recipe dates back to 2005… so it’s been in my brain for a while now.
I realized a few weeks back that I hadn’t made sweet potato gnocchi in YEARS. It’s not one of those things that you just randomly whip up, it requires some planning and some time but is well worth the effort. I was craving gnocchi the other day and put it in my schedule and then went to town.
For the actual gnocchi I stay true to the recipe. The only thing I’ve done differently is use my homemade ricotta instead of the store-bought crap. Seriously, ever since I discovered making my own ricotta I haven’t bought it from a store. It is just so easy to make and so much more delicious. AND it’s cheaper. Plus you get to snack on spoonfuls of warm ricotta. Everyone wins.
This time around I wanted to do up my gnocchi a bit more substantial than just with browned butter and sage as directed in the recipe. Some online searching turned up that mushrooms and chestnuts are a good accompaniment for pumpkin gnocchi… which is totally like sweet potato gnocchi. And so inspiration was born.
You’re probably thinking “hold up, wait a minute, it isn’t chestnut season”. And you would be right. While I love eating seasonally and all that jazz, sometimes a girl wants chestnuts in the springtime. I recently discovered these ready-to-eat chestnuts by Aurora and find they work really well in many dishes. Sometimes they are even okay to snack on. I knew they’d be perfect here.
To make this dish I basically sauteed a variety of mushrooms in butter and threw in the chestnuts. Let everything get all cooked and delicious. Then I added a bit of fresh sage and the gnocchi and it was done. Easy. If you have some gnocchi in the freezer this can come together really fast. It was pretty awesome. I’ve begun experimenting with salads and served this with a pretty kick ass kale salad.
Sweet Potato Gnocchi with Mushroom and Chestnuts
For Sweet Potato Gnocchi recipe click here
Mushroom and chestnut sauce
Butter (enough to make things saucy)
A variety of mushrooms, sliced (I used portobello, cremini and shitake)
Cooked chestnuts, thinly sliced
Fresh sage, finely chopped
Melt butter in frying pan. Swirl around once melted to brown.
Add mushrooms and chestnuts and cook until mushrooms are softened.
Add in sage and cook stirring for about a minute to help crisp the sage.
Add in gnocchi, mix and serve.
On my recent trip to London I tried the lamb chops at New Tayyabs and fell in love. They were yogurt marinated and grilled to perfection. In my post I described them as meat lollipops and the description still stands. Since I’ve been craving these lamb chops and can’t jet off to London on a whim (unfortunately) I decided that I needed to fill that void on my own.
I don’t typically make lamb, my Indian food is never as good as at the restaurant and I don’t own a grill so I knew it would be an uphill battle… but I was ready for the challenge. I picked up some precious lamb t-bones from Sanagan’s, found this recipe from Food & Wine and heated up the broiler and was ready to go!
I marinated the lamb overnight in a spiced yogurt mixture which obviously infused it with spice and also tenderized the meat. Since the t-bones weren’t super thick they were perfect to cook under the broiler for a few minutes on each side. They got that crusty exterior while still staying tender on the inside.
I decided to make this an all out feast and serve the lamb with some Indian rice pilaf type deal and some garlicky kale. And since the weather has been nice I ate on the balcony and life was the much better. The spicing on this lamb was great and could easily work with goat, beef and even chicken.
Tandoori Lamb Loins
8 lamb rib chops (2 1/2 pounds)
3/4 cup Greek yogurt
1/4 cup heavy cream
3 tablespoons fresh lemon juice
One 3-inch piece of fresh ginger, peeled and minced
4 large garlic cloves, minced
1 tablespoon malt vinegar
1 tablespoon garam masala
1 tablespoon ground cumin
1 tablespoon paprika
1/2 teaspoon cayenne pepper
1/4 teaspoon ground mace (optional)
1/4 teaspoon freshly grated nutmeg
Kosher salt
In a large bowl, whisk the yogurt with the heavy cream, lemon juice, ginger, garlic, malt vinegar, garam masala, cumin, paprika, cayenne, mace, nutmeg and 1 teaspoon of salt. Add the lamb covering with marinade on all sides and allow to marinate in the fridge overnight.
Preheat the broiler and remove the chops from the marinade and let stand at room temperature for 30 minutes.
Season the lamb with salt and place under the broiler cooking for about 4 minutes on each side or until desired doneness.
(Recipe from Food & Wine)
Ok folks, it’s that time of year again… RHUBARB SEASON! I’ve been hearing reports of people buying rhubarb for the past few weeks and I finally got around to grabbing a pound of the stuff while on a recent market trip.
I find that whenever I buy rhubarb I don’t have a specific use in mind. I just go all googly-eyed when I see it, snatch it up and think about a plan later. So far that strategy has worked for me. This time around (as per usual) I wanted to make something that I hadn’t made before. I’ve made tarts, and pudding cakes and country cakes so those were all out. A search for rhubarb recipes turns up a lot of compotes which I wasn’t really feeling. That’s when I stumbled across this recipe for bread pudding! I was totally on board… until while grocery shopping I didn’t feel like going all the way. Since I’m moving I hate the idea of buying stuff that I won’t consume over the next 2+ months which is why I didn’t want to buy raspberry preserves. Well that and also the snob in me wish I had homemade raspberry preserves on hand. I also for some reason didn’t feel like buying whipping cream… that one I can’t explain.
So with about 3/4 of the ingredients secured for that recipe I decided to flip the script and try something new. I was intrigued by this recipe and decided to adapt it somewhat. It pretty much had me at whiskey sauce. What I ended up doing was a mishmash of ingredients and techniques from both recipes to make the ultimate rhubarb bread pudding.
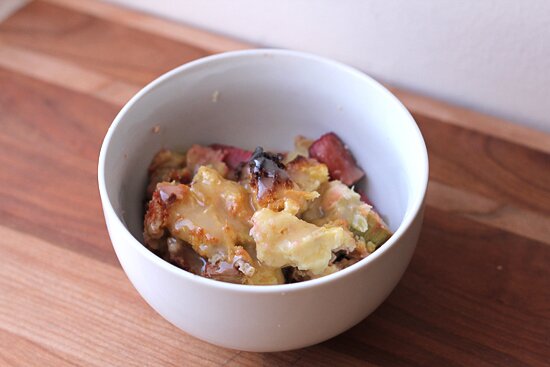
I started off by soaking slices of challah (or as I say it in my head… HOLLLAAAAA) in a gingery custard for about two hours. Then I mixed the bread with rhubarb, strawberries and sugar and baked that ish up. When it was all puffy and golden brown I let it sit while whipping up a buttery brandy sauce.
The results were amazing. Why have I been sleeping on bread pudding? It is goodness in a bowl. It’s all warm and soft and sweet with bits of fruit in it. AND I get to pour booze over it? Sign. Me. Up.
Gingery Rhubarb and Strawberry Bread Pudding with Brandy Sauce
Bread Pudding
4 large eggs
1 cup whole milk
1 cup half-and-half
1/2 cup granulated sugar
2 tablespoons crystallized ginger, finely chopped
1 teaspoon pure vanilla extract
1/4 teaspoon kosher salt
5 cups day-old challah bread (or brioche), cut into 1/2-inch cubes
3/4 pound fresh rhubarb, cut into 1/2-inch slices
1/4 pound fresh strawberries, sliced
1/2 teaspoon ground cinnamon
Brandy Sauce
4 tablespoons unsalted butter
1/4 cup granulated sugar
3 tablespoons half-and-half
2 tablespoons brandy
Pinch of salt
In a large bowl, beat together the eggs, milk, half-and-half, 1/4 cup of the sugar, ginger, vanilla, and salt. Mix the bread into the egg mixture and let it rest covered in the fridge for at least 30 minutes up to 2 hours. Be sure to push the bread down so that each piece gets covered in the egg mixture.
Preheat the oven to 375°F and butter an 8-inch-square baking pan. Combine the rhubarb, strawberries, the remaining 1/4 cup of sugar, and the cinnamon in a bowl. Carefully mix the rhubarb mixture into the bread mixture and then pour into prepared pan. Bake until golden brown and slightly puffed, 55 minutes to 1 hour 5 minutes. Remove from the oven and cool on a rack for about 30 minutes.
In a small saucepan, melt the butter over medium heat and then whisk in the sugar, half-and-half, brandy, and salt. Allow the mixture to simmer and stir often until the sauce has thickened (about 3-4 minutes). Remove from heat and serve oveBring to a simmer and cook, stirring frequently, until the sauce is slightly thickened, 4 to 5 minutes. Remove from the heat. Serve sauce drizzled over bread pudding.
I have been totally giddy to write this post for AGES! AGES I tell you.
Not because I’m bursting at the seams to write about the latest deliciousness consumed while in Chicago.
Because I FINALLY get to share the hugest thing to happen to me in a while. It also explains why I’ve sucked at posting for the past few months…
I’M GOING BACK TO SCHOOL!
Yes, at the ripe “old” age of 29 I’ve decided to forgo having an income for two years and go off to get my MBA so that I can have certified baller status upon completion.
And how does Chicago figure in all of this? Well I’ve been accepted at Kellogg School of Management at Northwestern University in Evanston, IL (just outside of Chicago) so after years of exploring my inner Canadian, New Yorker and Parisian, I’ll be saddling up and trying my best to be a Midwesterner. For the record I will not lose my edge nor will I don a North Face jacket (seriously, is it just me or is North Face HUGE in the Chicago area?). I will however do my best to consume copious amounts of beer, beef and Wisconsin cheddar.
School starts in September and I’ll be taking the summer off to “get ready for the school”. I’m planning on continuing to update the blog while I’m at school. I’m excited for Midwestern food adventures and finding my new fave spots to acquire ingredients. Plus being so close to Chicago, I’m excited to continue to eat my way through that city and hang with my sis.
Speaking of Chicago eats… I’ve had to visit Chicago a few times during this whole application thing. Here are some of my highlights from the food scene (all photos taken via iPhone and occasionally filtered through Instagram)…
400 North Franklin Street
Chicago, IL 60654
 I love doughnuts and on a trip to Chicago over a year ago decided to hit up the Doughnut Vault. The thing about DV is that you have to line up when the shop opens and they often sell out EARLY. Sadly when we went despite getting there at around 9am on a Saturday the doughnuts sold out not long after. Luckily this random guy on the street saw how sad we were and gave us one of his doughnuts so that we could experience the joy.
On this trip I just HAD to have me some doughnuts. So much so that I literally took the El from the airport directly to the Doughnut Vault WITH ALL MY LUGGAGE to get doughnuts. And even THEN they had sold out of some flavours. Luckily I was able to snag a vanilla, a chocolate and a chestnut. The doughnuts aren’t cheap (about $3) but they are HUGE and delicious. I’m not sure what my fave was but they all made me happy. I would recommend following them on Twitter on the day that you want to go in order to keep tabs on how many doughnuts they have.
Sable Kitchen & Bar
505 North State Street
Chicago, IL 60654
I decided to visit Sable on the recommendation of who had a great meal there while she was in Chicago. Sadly Sable will always be cemented in my memory as the restaurant where I watched the events of Whitney Houston’s death unfold on my iPhone. Le sigh.
Sable has a strong focus on cocktails but also offers a fairly diverse menu featuring a wide variety of meats and some good vegetarian options as well. They really had my heart when I saw that they offered half portions of a lot of their entrees. I’m a sucker for wanting to try like 7 different things at dinner and this totally allowed me to explore that.
Dinner consisted of…
 Chicken and waffles – mini waffles with little bites of chicken = totally delish
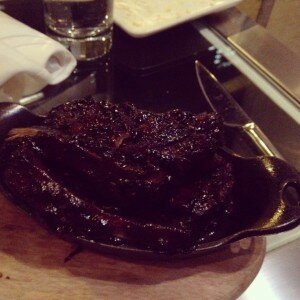
Pomegranate glazed spare ribs – good but a very large portion even at the half size
Duck fat steak fries – sprinkled with cheese and totally addictive
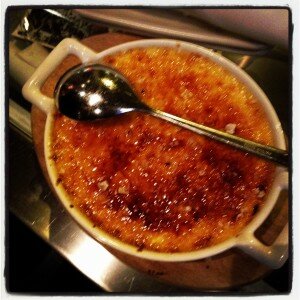 Sweet corn creme brulee – this is a side dish (think creamed corn but sweeter) and is most excellent
Sable is a great reasonably-priced option if you’re in the River North area. Fun and busy vibe too!
Table Fifty-Two
52 West Elm Street
Chicago, IL 60610
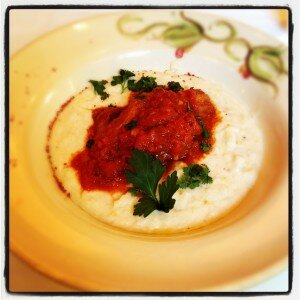
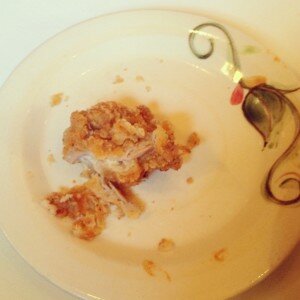
My sis had been raving about brunch at Table 52 for ages so we finally decided to hit it up. Art Smith is the chef and has some sort of association with Oprah. The restaurant has a southern bent to it given Smith’s background which is a total win for me. I opted for the shrimp and grits which were pretty good. The shrimp were in a tomatoey sauce and the grits were creamy and delicious. While the shrimp and grits were a hit what really had my heart was the chicken and waffles that my sister dined on. Literally the best fried chicken I’ve ever had. It even inspired me to recreate them at home. This isn’t a cheap brunch (those chicken and waffles cost $24) but it was definitely worth it!
Pump Room
1301 North State Parkway
Chicago, IL 60610
Pump Room is a Jean Georges restaurant in the Public Hotel in Chicago. It’s kind of like the sister restaurant to ABC Kitchen in New York (which I hope to visit this summer). We had a hard time deciding what to eat. The appetizers sounded interesting but when it came down to the mains nothing really jumped out at us. So we opted to order a bunch of appetizers and forgo the mains.
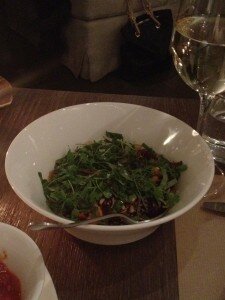
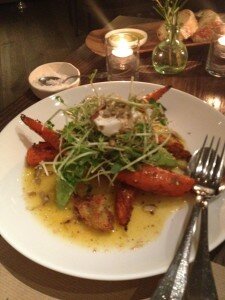
We ended up going with a salad and the carrot and avocado salad. We also had a whole wheat flat bread with mushrooms and egg, calamari and for dessert this apple pie type thing. The food was good but not fabulous. We may have ordered poorly or visited on a day with a less than exciting menu. I’m open to giving it another chance and will definitely visit ABC Kitchen.
For the life of me I can’t understand people who aren’t down for chicken and waffles. Especially people who have never tried it. I mean, fried chicken = good. Waffles = good. WHAT IS NOT TO LOVE???
When I go for brunch and am presented with the option to order chicken and waffles chances are I’ll order it. I MAY be swayed if shrimp and grits are on the menu or if I’ve already had the chicken and waffles and they weren’t all that and a bag of chips. But chance are, I’m getting the chicken and waffles.
I’m not sure the first time I had chicken and waffles but my most distinct chicken and waffle memories come from living in Harlem. I was a stone’s throw away from some of Harlem’s most popular soul food joints and hit up Sylvia’s, Spoonbread, and of course Amy Ruth’s (where I’d order The Rev. Al Sharpton, fried). In Toronto my fave iteration of chicken and waffles can be found at Stockyards. In Chicago I mess with Art Smith’s chicken and waffles at Table 52. I even hit up Roscoe’s House of Chicken and Waffles while in LA (my body is still oozing deep fried and sugar after that meal). Actually typing up this list I realize that I’ve had A LOT of chicken and waffles and I don’t think this is even half the places that I’ve been to!
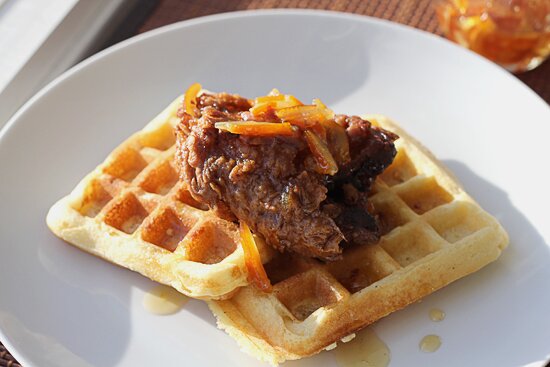
After my recent fried chicken exploits I had leftover chicken that needed to be consumed. Rather than repeating my southern feast I decided to take things up a notch and make my own chicken and waffles. With the chicken already done I had two pieces of business to sort out, the waffles and the syrupy goodness.
For the waffles I didn’t want to do a plain buttermilk waffle but I didn’t want anything too fancy. So I decided to go with my fave pancakes/waffle mix-in… cornmeal! I love how cornmeal adds an extra bit of nuttiness and some crunch to things. I used this recipe from Martha Stewart for guidance and went to town.
For the syrupy goodness I wanted to recapture some of the magic I discovered with this post. I’m out of my blueberry preserves and really, I don’t think that would work anyhow but I did have some marmalade on hand. I melted the marmalade with a bit of water, added some red pepper flakes and maple syrup and allowed everything to get to know each other a little better. The results, a slightly spicy, tangy, maply syrup. Pretty brilliant if you ask me.
This was the best chicken and waffles I’ve had in a minute. Every component was just spot on. I now have to stop myself from making this all. the. time.
As some of you may know, I went to undergrad at NYU and lived in the village/Union Square for much of that time. That time happened to be between 2001 and 2005. During this time Sex and the City was hugely popular and a few months before starting at NYU there was an episode where Carrie and Miranda ate cupcakes in front of a cute bakery in New York. The bakery was Magnolia Bakery. Upon moving to New York, it feels like I spent a significant portion of freshman year lined up outside of Magnolia for cupcakes. Yes, in line. That line would trickle out of the store and extend along 11th St. Kind of insane.
And of course since the line was so long AND because I suffer from indecision, I would inevitably buy a box of 4(!) cupcakes and get a mix of vanilla and chocolate cupcakes with a variety of frosting colours. It’s a wonder that I didn’t gain the Freshman 15. And for the record, it’s not because I actually gained the Freshman 25 instead. At some point I decided to expand my Magnolia purchases. Sometimes I’d get a mini cheesecake (and a cupcake). Sometimes I’d get a red velvet cupcake (and another cupcakes). Sometimes I’d even get a cookie (and… a cupcake). But then one day I ordered the banana pudding and in changed my life.
I’m not sure why I ordered banana pudding. I had never heard of it before, it didn’t look particularly appealing and I’m not a huge pudding fan. I suspect my sister was with me and suggested ordering it. Whatever, I ordered it and it was delicious. This shook up my traditional Magnolia order. Now, I’d likely get an order of the pudding and a cupcake or two. Again, it’s a wonder I’m not obese.
I recently made a southern feast and wanted an easy to execute southern dessert. That’s when Magnolia’s banana pudding popped into my head. Luckily they published the recipe in one of their cookbooks so the recipe is easy to find online. The recipe is also surprisingly uncomplicated. All you need is: condensed milk, Jell-O vanilla pudding powder, cream, bananas and Nilla Wafers. This is totally on some Sandra Lee “semi-homemade” ish.
This is a great make-ahead recipe and is easily scalable for a party. I opted to half the recipe and make it in jars of single-sized portions (although my definition of “single” is pretty loose). This was one of the those rare cases where the homemade tastes quite spot on to what you’d get in the shop. Seriously, it tastes just like the original. But then I became concerned… the original uses Jell-O instant pudding mix? You can’t win ’em all.
Magnolia’s Banana Pudding
1 (14-ounce) can sweetened condensed milk
1½ cups ice cold water
1 (3.4-ounce) package instant vanilla pudding mix (preferably Jell-O brand)
3 cups heavy cream
1 (12-ounce) box Nabisco Nilla Wafers
4 cups sliced ripe bananas
In a small bowl, on the medium speed of an electric mixer, beat together the sweetened condensed milk and water until well combined, about 1 minute. Add the pudding mix and beat for about 2 minutes or until thoroughly combined. Cover and refrigerate for 3-4 hours or overnight. , before continuing.
In a large bowl, on the medium speed of an electric mixer, whip the heavy cream until stiff peaks form to make whipped cream. Carefully fold the pudding mixture into the whipped cream until well blended and no streaks of pudding remain. To assemble the dessert, select a large, wide bowl (preferably glass) with a 4-5-quart capacity. Cover the bottom of the bowl with one-third of the wafers, then one-third of the bananas and one-third of the pudding. Repeat the layering twice more. If you want to get fancy, garnish the top with wafers or wafer crumbs. Cover with plastic wrap and allow to chill in the fridge for at least 4 hours (the longer the better so that the wafers get soft).
The crappy thing about winter is that there are far fewer things to can. If you’ve been following the blog you know that this summer I transitioned to pickling instead of making jam. I also preserved some peaches in syrup and made my fave Peach Jam with Pinot Noir and Cinnamon but these days I’ve been craving some sweet canned goodness. Around this time of year the most logical thing to make is marmalade since citrus fruits are in abundance. I wanted to make a Seville Orange Marmalade (like I even know what a Seville orange is but people sure do love to use them to make marmalade) but I had just missed the season. So it was onto blood oranges.
Here’s the things about marmalade, I can’t say with confidence that I’d ever had it before. If given a variety of spreadable options, marmalade is probably the last thing I’d try. How could I pass up a strawberry, raspberry or blueberry jam? I’d probably even choose honey before marmalade. I’m sure I’ve had it over the years but not enough to leave me with a distinct impression. Since I wasn’t sure if I even cared for marmalade I decided to make a very small batch just to whet my canning desires.
Around the time that I decided to make marmalade, Monica over at Nervous Chef was doing the same… and with blood oranges! Definitely check out her post. She led me to Sarah Hood’s (local canning goddess extraordinaire) post about Seville Orange Marmalade which I followed as my guide.
Marmalade making seemed a bit less worry free than my usual jam making, I’m not sure why. It could be my confidence since I’m much more experienced with canning now. Towards the end I did become a bit unsure when I had to assess whether or not I had enough water in the pot. Oh! And I got creative with things and added a vanilla bean into the mix.
For my first foray into marmalade I was impressed. While I didn’t have as much jelly as I would’ve liked (things were heavy on the peel) I have to admit that marmalade is fantastic! I served my marmalade on some homemade croissants with homemade ricotta… because I’m fancy like that. I’m already getting excited for next winter and all of the possibilities. I’ll get in on the Seville orange goodness and maybe some clementines, maybe some meyer lemon… the possibilities are kind of endless.
-
Contact Me
-
instagram
-
LIke Me on Facebook
-
Tweet Tweet!
Follow the Blog Follow Me
-
Subscribe!
-
Archives
-
Categories
- Baked Goods (98)
- Barefoot Bloggers (25)
- Beverages (1)
- Breakfast/Brunch (47)
- Contests (2)
- Daring Cooks/Bakers (5)
- Jam (8)
- Main Course (241)
- Meat (78)
- Miscellaneous (95)
- Music (1)
- Pasta (40)
- Poultry (35)
- Reviews (6)
- Salads (12)
- Sandwiches (16)
- Seafood (74)
- Side Dishes (44)
- Soups (26)
- Things I Want/Bought (15)
- Tips and Tricks (28)
- Toronto (36)
- Travel (54)
- Treats (117)
- Uncategorized (1)
- Vegan (54)
- Vegetarian (118)
-
My Amazon Store

